
Sourdough Baking Journal: What To Track For Better Bread Notes
Sourdough bread can make you feel like you are improving and guessing at the same time.
Disclosure: This article contains affiliate links. As an Amazon Associate, Logik Press earns from qualifying purchases at no extra cost to you.
One loaf has a beautiful crust but a dense center. Another tastes amazing but spreads flat. Another rises well, but you cannot remember whether you used more starter, waited longer, changed flour, or baked it hotter. The bread is gone, the kitchen is clean, and the clue is gone with it.
That is where a sourdough baking journal helps.
A baking journal is not about turning bread into homework. It is about writing down the details that your memory drops. When you track the starter, dough, timing, temperature, shaping, proofing, scoring, baking, and final result, your next loaf starts with evidence instead of a shrug.
The best sourdough notes are simple, repeatable, and honest. You do not need a professional bakery log. You need a place to answer: what did I do, what happened, and what should I try next time?
Start With The Starter
Your bread notes should begin before the dough exists. A sourdough loaf depends on the condition of the starter you used.
Track:
- Date and time starter was fed
- Flour and water amounts
- How long it took to rise
- Whether it doubled or peaked
- Smell and texture
- Room temperature
- Time starter was added to dough
South Dakota State University Extension explains that sourdough starters are living cultures of yeast and bacteria growing in flour and water, and that temperature, time, moisture, and other factors influence their growth. That is why “I used starter” is not enough detail. A sleepy starter and a lively starter can lead to different dough behavior.
Write what you saw. If the starter was bubbly and doubled, say that. If it had barely moved, say that too. A baking journal is most useful when it tells the truth.
Track The Formula Without Making It Complicated
You do not have to become a baker’s-percentage expert to keep useful notes. Start by writing down the actual amounts you used.
Track:
- Flour type and amount
- Water amount
- Starter amount
- Salt amount
- Any add-ins
- Recipe source
- Any changes you made
The most important line is the change line. Many home bakers follow a recipe, adjust three things, and then forget which adjustment mattered. Write the change even if it feels small:
- Used bread flour instead of all-purpose
- Added 25 grams less water
- Used cold water
- Added seeds
- Forgot one stretch and fold
- Bulk fermented longer than planned
These details become gold later.
Track Time In Stages
Sourdough has several timing moments. If you only track the start and end, you lose the middle of the story.
Track:
- Starter feeding time
- Mix time
- Autolyse or rest time, if used
- Stretch-and-fold times
- Bulk fermentation start and end
- Shaping time
- Final proof start and end
- Refrigerator time, if used
- Bake time
- Cooling time before slicing
You do not need to record every minute perfectly. Even rough timing helps. “Bulk from 10 a.m. to 3 p.m. in a cool kitchen” is better than “made bread.”
This is especially important because temperature changes timing. A dough that needs five hours in one kitchen might need more or less time in another. Notes help you learn your room, your starter, and your schedule.
Track Dough Feel
Dough feel is hard to describe at first, but it gets easier when you use the same words each time.
Try words like:
- Sticky
- Loose
- Elastic
- Tight
- Puffy
- Strong
- Slack
- Wet
- Smooth
- Bubbly
Then add one plain sentence:
- “Dough held shape better after second fold.”
- “Still very sticky after bulk.”
- “Felt airy before shaping.”
- “Tore easily when stretched.”
These notes are useful because they connect process to outcome. If the loaf spreads flat, you can look back and see whether the dough felt weak during shaping. If the crumb is tight, you can look back at proofing and fermentation notes.
Track Shaping And Proofing
Shaping and proofing are easy to skip in notes because they happen when you are already busy. Do not skip them.
Track:
- Pre-shape or final shape style
- How the dough felt during shaping
- Basket, bowl, or pan used
- Counter proof time
- Refrigerator proof time
- Whether the dough looked puffy before baking
Write down what you expected and what happened. If the dough over-relaxed, note that. If it held tension beautifully, note that too.
The goal is not to judge the loaf before it bakes. The goal is to connect the look and feel of the dough with the final bread.
Track The Bake
Once the dough goes into the oven, the notes still matter.
Track:
- Oven temperature
- Preheat time
- Dutch oven, baking stone, sheet pan, or loaf pan
- Lid-on time, if using a covered baker
- Lid-off time
- Steam method, if any
- Final internal temperature, if you measure it
- Crust color
- Cooling time
Do not slice too early if your recipe tells you to wait. But when you do slice, write the result while it is fresh in your mind.
Track The Final Loaf
This is the part most people remember to photograph but forget to describe.
Track:
- Crust color and thickness
- Crumb texture
- Flavor
- Sourness
- Oven spring
- Shape
- Bottom crust
- Whether the center seemed gummy or fully baked
- What you liked
- What you would change
Photos are helpful, but words add context. A photo can show the crumb. It cannot tell you that the loaf tasted too sour for your family, or that the crust was perfect but the bottom got too dark.
Make A “Next Time” Line
Every bake note should end with one next step.
Keep it small:
- Try a warmer bulk fermentation spot.
- Reduce water slightly.
- Feed starter earlier.
- Extend cooling time.
- Bake five minutes longer uncovered.
- Use the same method again.
“Use the same method again” is an underrated note. Not every loaf needs fixing. Sometimes the next step is to repeat what worked.
Use Notes To Avoid Changing Too Much
When a loaf disappoints you, the temptation is to overhaul everything. New flour, new schedule, new recipe, new hydration, new shaping method. That makes the next loaf harder to understand.
Your baking journal should slow you down in a good way.
Pick one adjustment. Track it. Compare it. If the loaf improves, you know something. If it does not, you still know something.
That is the quiet magic of notes. They turn frustration into information.
Keep A Favorite Loaf Page
Once you bake a loaf you really like, give it its own page.
Write down the formula, starter condition, timing, room temperature, proofing method, baking setup, and what made the loaf worth repeating. Add a photo if you use printed photos or a digital folder. Then mark the page clearly as a favorite.
This gives you a personal baseline. When a later loaf goes sideways, you can compare it to the favorite loaf instead of comparing it to a vague memory. What was different? Was the starter stronger? Was the room warmer? Did you use less water? Did you wait longer before slicing?
A favorite loaf page also reminds beginners that sourdough is not only troubleshooting. The journal should capture wins too.
Free Bread Notes Checklist
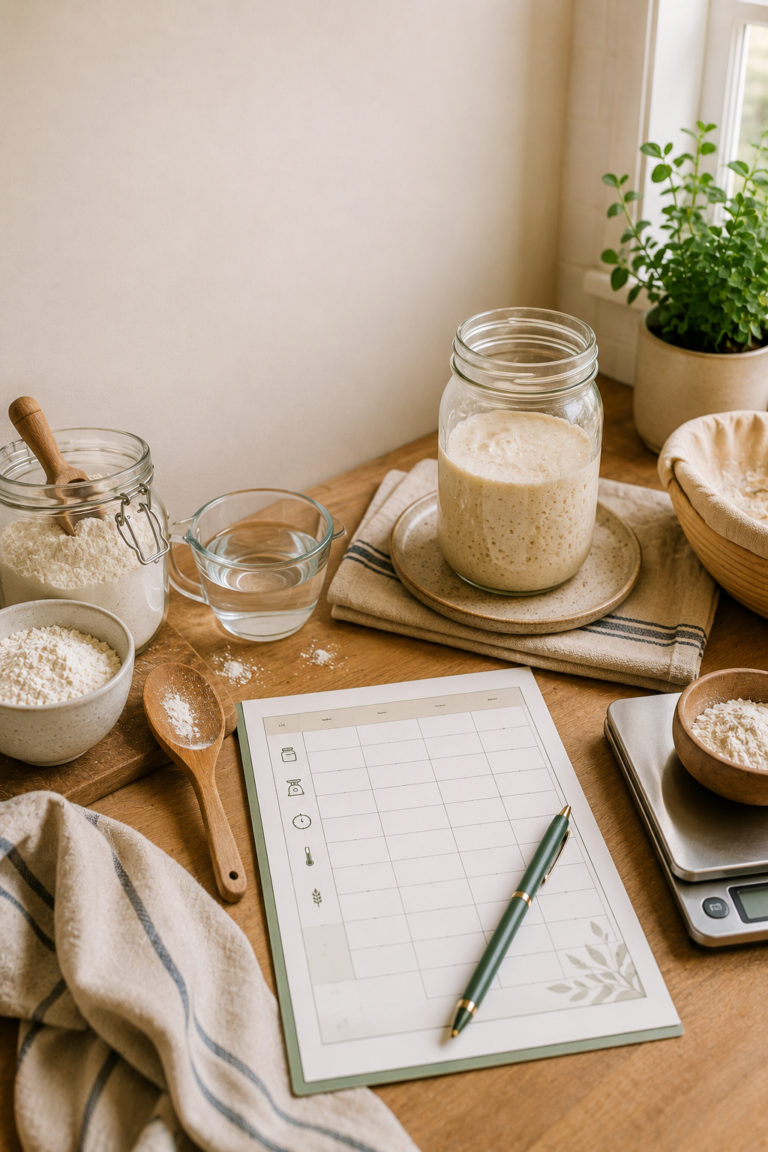
Pair this post with a one-page Sourdough Bake Notes Checklist that gives the reader a simple place to track:
- Starter condition
- Formula
- Timing
- Dough feel
- Proofing
- Bake details
- Final loaf notes
- Next-time change
The printable should feel easy enough to use while flour is still on the counter.
Keep A Next-Time Box
A baking journal is most useful when it ends with one small decision. Add a simple box called “next time” at the bottom of each bake note. Do not fill it with ten improvements. Choose one thing to test.
Maybe next time you will extend bulk fermentation by thirty minutes, reduce water slightly, score deeper, preheat longer, bake darker, or use the starter closer to peak. One change at a time helps you learn what actually made the difference.
This turns every loaf into useful practice. Even a disappointing bake gives you information. The journal keeps that information from disappearing before the next mixing day.
Internal Links
- Link to the starter feeding post: sourdough starter feeding log guide
- Link to the free sourdough starter feeding log PDF: free sourdough starter feeding log
Sources Used
- South Dakota State University Extension, Sourdough Starters: SDSU Extension sourdough starter guidance
- Clemson Cooperative Extension HGIC, All About Sourdough Discard: Clemson Extension sourdough discard guidance
- UC Agriculture and Natural Resources Master Food Preserver, Can This Sourdough Starter Be Saved?: UCANR sourdough starter troubleshooting
Helpful Next Step
If the reader wants the feeding log and bake notes in one organized place, add the Sourdough Starter and Baking Journal softly at the end:
- Sourdough Starter and Baking Journal: View on Amazon
Position it as an optional helper for bakers who want one place to track starter behavior, loaf experiments, and repeatable results.